| Items: | 0 |
| Subtotal: | $0.00 |
TextPLEASE EMAIL ME AT duanesechser@hotmail.com or call me at 605-359-8939
If you have any questions or need help with anything I am here to help!
HERE IS SOME ANSWERS TO QUESTIONS ABOUT THE NEEDLE SIZE & THREAD TO USE WITH YOUR SINGER 306, 319 AND SIMILAR Machines Where can I get a chart for 319w needle size and thread size? thank you, duane Dear Mr. Sechser, Thank you for writing Singer. This household machine uses standard Singer needles. You can use a 2020 for woven fabrics and a 2045 for knits. Most commonly used size is a 14 for medium weight. Lighter fabrics could use either a 9 or 11. Denim uses size 16. Please use general purpose weight thread. This type of thread is available at chain retailers such as Hancocks and JoAnn Fabrics as well as your local sewing retailer. Make sure not to use quilting weight threads in the machine as it will effect the tension. Singer Consumer Affairs Department SVP Worldwide.HERE IS SOME ANSWERS TO QUESTIONS ABOUT THE NEEDLE SIZE & THREAD TO USE WITH YOUR SINGER 306, 319 AND SIMILAR MACHINES Where can I get a chart for 319w needle size and thread size? thank you,
duane
Dear Mr. Sechser,

Thank you for writing Singer. This household machine uses standard Singer
needles. You can use a 2020 for woven fabrics and a 2045 for knits. Most
commonly used size is a 14 for medium weight. Lighter fabrics could use
either a 9 or 11. Denim uses size 16.

Please use general purpose weight thread. This type of thread is available
at chain retailers such as Hancocks and JoAnn Fabrics as well as your local
sewing retailer. Make sure not to use quilting weight threads in the
machine as it will effect the tension.

Singer Consumer Affairs Department

SVP Worldwide
THREAD TENSION ISSUES
  Hello, are you some of the many that are having problems with getting their thread tension set proper or are having trouble getting the top thread tension adjusted to the correct tightness or setting. I have helped several people in finding out what their problem was and most were to the point of just putting the machine back in storage because they just could not get it to work. I had a lady who had not sewed in many years she purchased a machine from me and when she got it she set the machine up and threaded it put in a bobbin and began to sew. She noticed that the top thread tension was not tight and so she adjusted the tension but it stayed the same so she went back through the manual step by step and could not find the problem. This poor lady was ready to pull her hair out, she emailed me and I gave a few suggestions still she was still having problems, I gave more suggestions, to make a long store short it was that she had her bobbin in backwards. I am going to tell you a few things to check if you are having problems with the thread tension. 1. Thread weight in spool and bobbin may cause tension to be different 2. Make sure you have the machine threaded correct 3. Make sure thread is going through the wire or spring correct on tension 4. Make sure needle is inserted correct flat side of needle facing correct direction for the machine you are using (they are different) and that it is a new needle or that it doesn’t have a hook or point is flat, this can cause stitch skips and more problems. 5. Make sure the little finger on rotary is in space on needle plate; if this is not correct can cause all kinds of problem.  off bobbin clock wise and that the thread is pulled into the slot on the spring of bobbin case if this is
not correct it will cause loose stitch because the spring is not doing its job. You may also need to adjust the little screw on the bobbin case and I have received machines and the bobbin case has buildup inside the case and causes the bobbin not to turn free.   There are a lot of little things that can cause your tension not to work correct and cause loose stitch, skip stitch, thread to bunch up so remember to look for these little things and if you are still having
problems make sure your machine is clean and that the rotary, bobbin case, thread tension parts are not missing or have broken parts (I had one machine that the hook on the rotary had a very little piece of the hook broken off). If you still can not figure it out I am willing to give it a shot just email me or I am willing to take a look at your machine if you like.  I have parts available for your older Singer machines take a look at my website,
Also eBay; IF YOU HAVE ANY QUESTIONS PLEASE CALL OR EMAIL ME!
I AM ABLE TO GET A LOT OF PARTS AND MAY NOT HAVE IT LISTED
BECAUSE OF THE TIME IT TAKES TO LIST ALL THE PARTS
call 1-605-359-8939
or email duanesechser@hotmail.com
Hello, if you’re reading this you are having more problems and you have adjusted the thread
tension as far as it will go and the thread is still bunching up on the bottom of the material! You’re really flustered and ready to pack the machine and put back in storage or throw it out,
well I am going to try and walk you through ways to fix this problem. We have to remember
that it is a machine and needs to be cleaned and maintained same as any machine. You take
your car in and have it looked at and have a tune-up so that it runs smooth and gets you from
point A to B right! 1. Check to make sure machine is threaded correctly Make sure you have
the thread in the disk going around and up through the spring tension up through the take-up
and down through the thread guides. 2. Check needle, some of singer machines insert with the
flat side of needle faces front of (Pictures from 1941 Manual Singer Manufacturing Co.) machine, 15-, 201-2 221, 222, 301, and others and the 66, 99 and a few others are opposite, and make sure needle is new or has no hooks or tip is not flat. 
(B2 and A2)
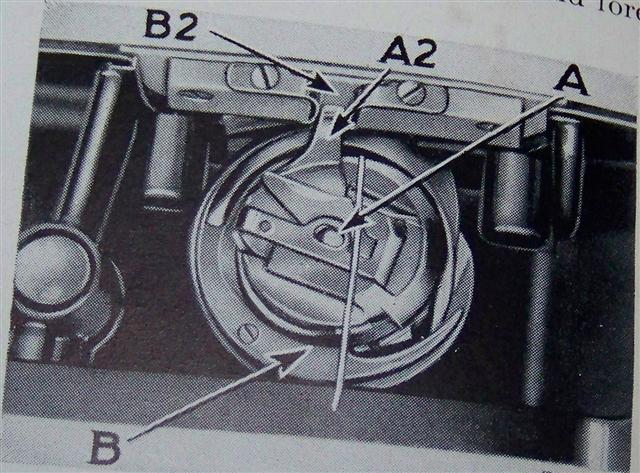 and is free of thread. You may have to loosen the two set screw and remove rotary and take apart to
remove any thread that may be wrapped around it and put a drop of sewing machine oil on the moving parts attach back to machine. 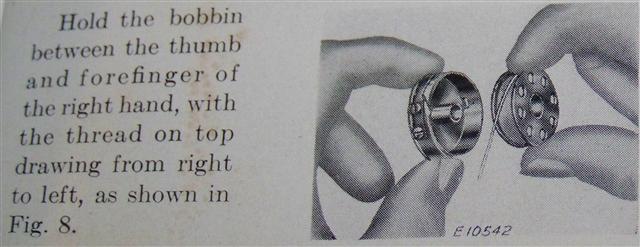 Make sure bobbin in bobbin case correct drawing string clockwise off of bobbin. Sew a few stitches with tension set around 3 ½ - 4 on setting, if you still have thread bunching up on bottom side of
material we need to concentrate on the thread tension assembly. When you lift the presser foot
lever to up position does the thread tension release? Check your spring does it have good tension or
is it weak? When you turn the dial does it turn all the way or does it catch in spots before turning from
0-9? Ok, if all these check out and are working what we do next, I have found that the thread tension
is a touchy part we may need to take it off the machine and clean & re-adjust it.
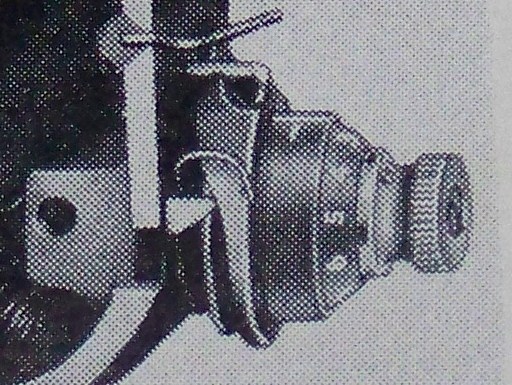 Take off the face plate and loosen the set screw, take off the little screw holding the chrome thread guide to the tension assembly and take a screw driver and insert into tension with fingers pull lightly
towards you while turning tension back and forth with screw driver (If your not comfortable doing this then you may have to take to repair shop) until you have it removed.
 The first thing to do is if you have a manual get it out it has a picture of the tension and its parts, have this handy in case you are unsure of how it goes back together. Now, since you have it out clean the
machine area of tension first then take apart the assembly by unscrewing the thumb nut and lay out the parts in the order they go back on.
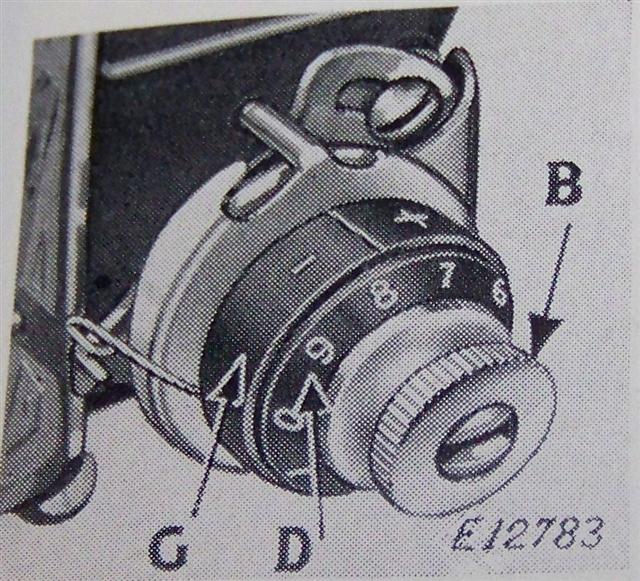 Clean the parts as needed from dirt or oil build-up When you have cleaned it and all parts look to be in good shape put back together but before putting back in your machine check the spring “T” to make sure there is some tension and that it is working correctly.
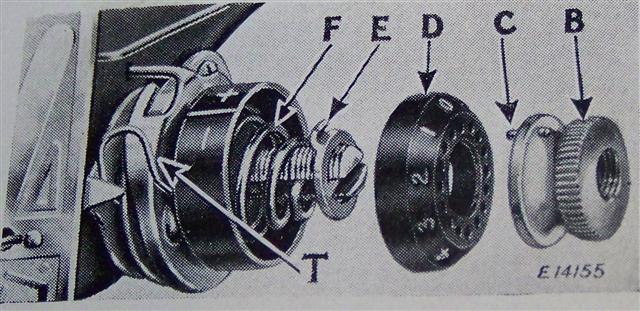 If it doesn’t feel to have any tension or is light you can pull the spring up and adjust to the left one tooth or as needed.
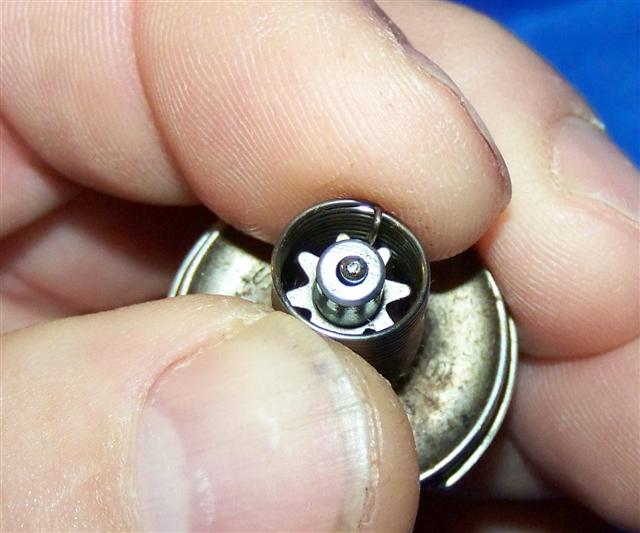 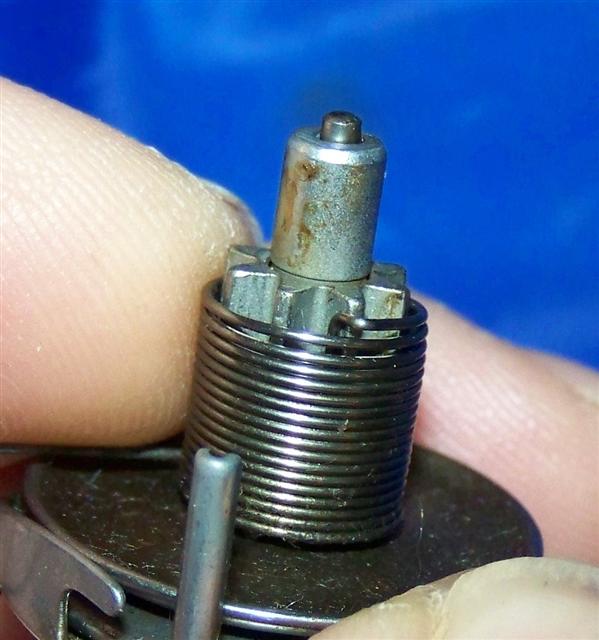 the top thread had made a mess on the bottom side. I adjusted the spring and it fixed the problem and the machine sews great now. If your machine is clean unlike this tension which as you can see is dirty needs to be cleaned but adjusting the spring fixed the machine. There are so many things that can cause problems and you just need to take the time and clean and adjust these parts and your ready to sew, I know that not everybody is comfortable doing this but it is an easy fix.  There is one more thing if this doesn’t fix the problem the part “E”. I have seen the center of this maybe bent out and is causing the tension pin “J” not to protrude out far enough to work proper and
may need replacing. This usually happens from pulling up to hard on pressure release lever. Take it
off machine and lay on bench take a small punch and lightly tap it towards the direction of the
machine will fix the problem but be sure not to hit to hard or you will break it. I hope this was helpful,
duane IF YOU HAVE ANY QUESTIONS PLEASE CALL OR EMAIL ME!
I AM ABLE TO GET A LOT OF PARTS AND MAY NOT HAVE IT LISTED
BECAUSE OF THE TIME IT TAKES TO LIST ALL THE PARTS
call 1-605-359-8939
HOW TO ATTACH YOUR SLIDE PLATE
TO YOUR SINGER 66, 99, 185 AND ANY OTHER SIMILAR MACHINE
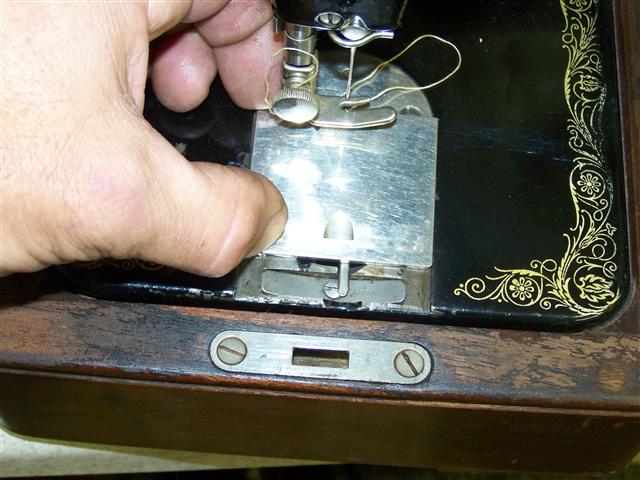 SLIDE PLATE INTO POSITION RIGHT TO LEFT
LIFT FOOT AND NEEDLE TO KEEP OUT OF THE WAY
SLIDE PLATE TO THE LEFT
MAKE SURE PLATE IS FACING CORRECT DIRECTION
 YOU MAY NEED TO RAISE THE FLAT SPRING JUST A
LITTLE TO LINE UP WITH THE GROVE ON BOTH
SIDES OF THE PLATE DO NOT LIFT TO HIGH OR YOU
WILL SNAP THE PLATE SPRING
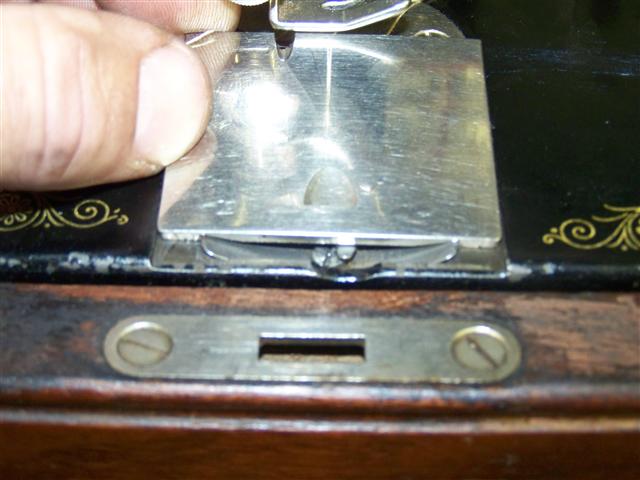 ONCE LINED UP SLIDE THE PLATE LEFT
ONTO THE SPRING
 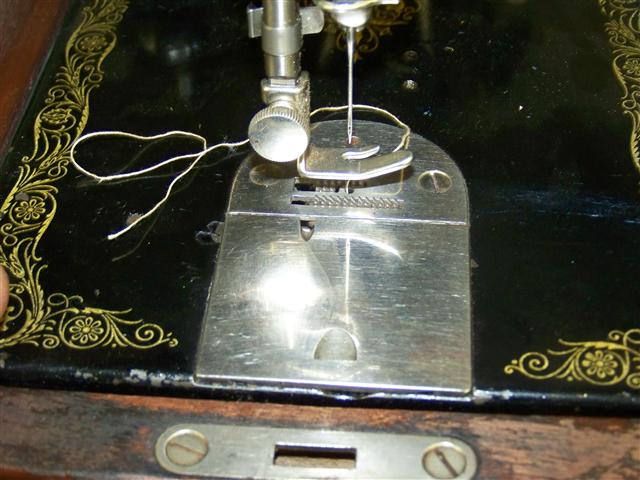 I HOPE THIS HELPED THOSE WHO FORGOT OR
DIDN'T KNOW HOW
TO PUT ON THEIR SLIDE PLATES
I HAVE HAD A LOT OF REQUEST ON HOW
TO PUT ON THE SINGER
66, 99, 185 AND OTHER SLIDE PLATES
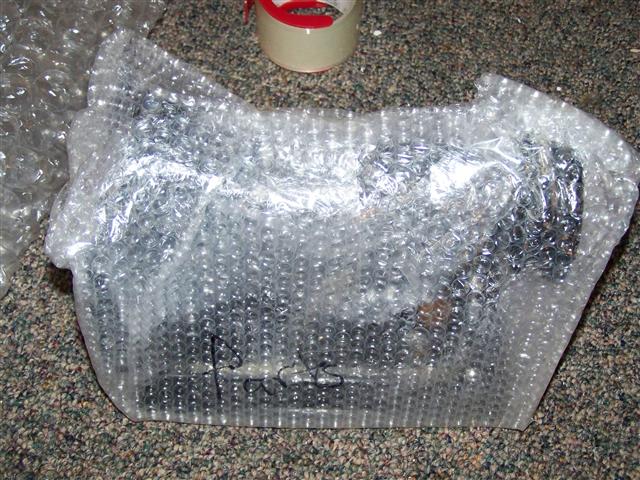
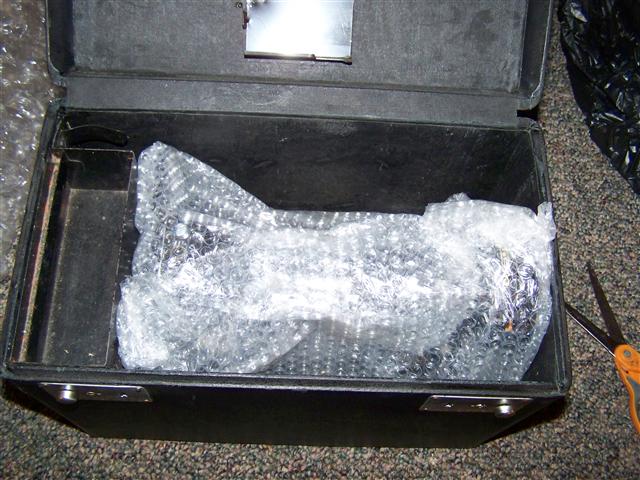
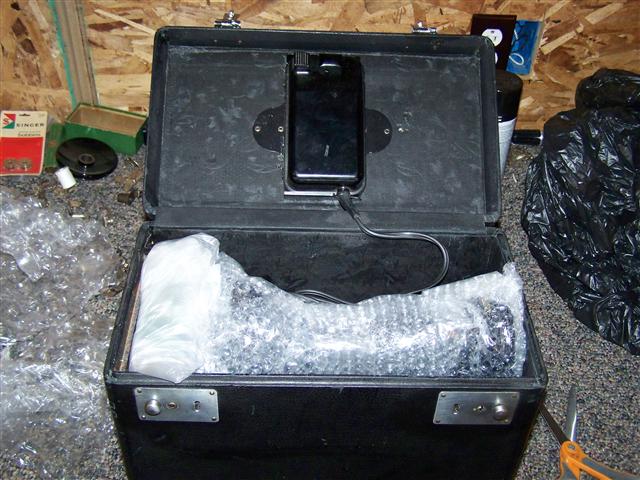
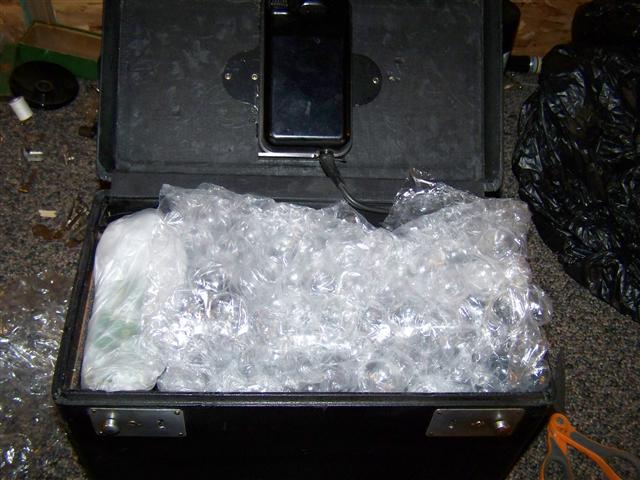
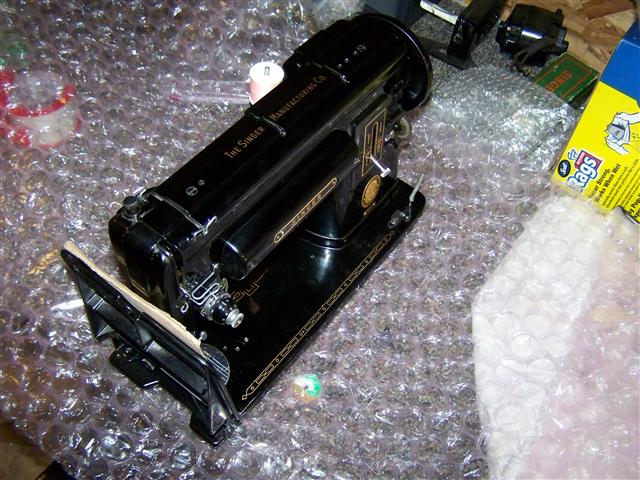
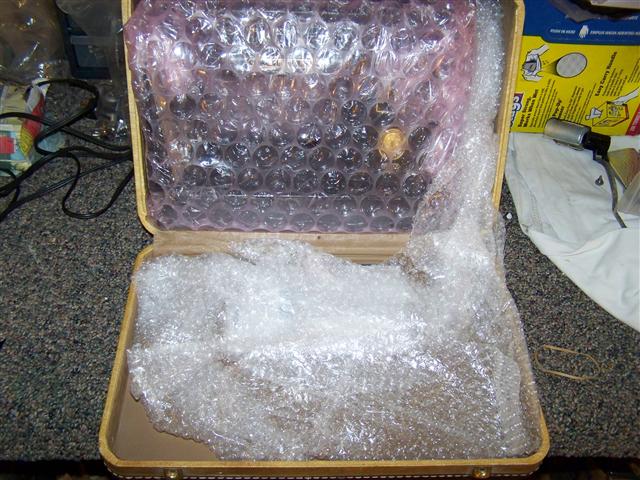
PACKING YOUR MACHINE FOR SHIPPING HELLO, I AM GOING TO TELL YOU HOW TO PACK YOUR SEWING MACHINE FOR SHIPPING TO THE NEW OWNER OR JUST TO MAKE THE MOVING TRIP SAFE! BE SURE TO UNPACK DO NOT LEAVE MACHINE PACKED FOR A LONG PERIOD OF TIME IT NEEDS AIR TOO. THERE ARE DIFFERENT WAYS OF PACKING YOUR MACHINE, I AM GOING TO SHOW YOU HOW I PACK AND HAVE HAD GREAT LUCK WITH IT. DEPENDING ON THE MACHINE AND THE SIZE OF THE CASE WILL MATTER ON HOW MUCH PACKING YOU USE, I USE BUBBLE WRAP AND PEANUTS BUT IF YOU DON'T HAVE THAT THEN USE WHAT YOU HAVE. THE MAIN POINT HERE IS THAT YOU DON'T WANT THE MACHINE TO BE ABLE TO MOVE AROUND DURING SHIPPING, THAT IS WHAT DAMAGES THE MACHINE AND CASE. THE FIRST THING YOU CAN DO IS TAKE OFF THE SPOOL PIN COVER TO BE SURE IT DOESN'T GET DAMAGED OR DAMAGE THE CASE. I PACK MOST WITH IT ON AND IF YOU WANT TO LEAVE IT ON JUST MAKE SURE TO PUT ENOUGH PACKING ON TOP OF MACHINE SO IT FITS SNUG WHEN YOU CLOSE THE LID. JUST REMEMBER IF THE MACHINE IS IN A CARRING CASE, YOU WANT TO HAVE ENOUGH PACKING IN AND AROUND THE MACHINE SO IT DOES NOT MOVE. 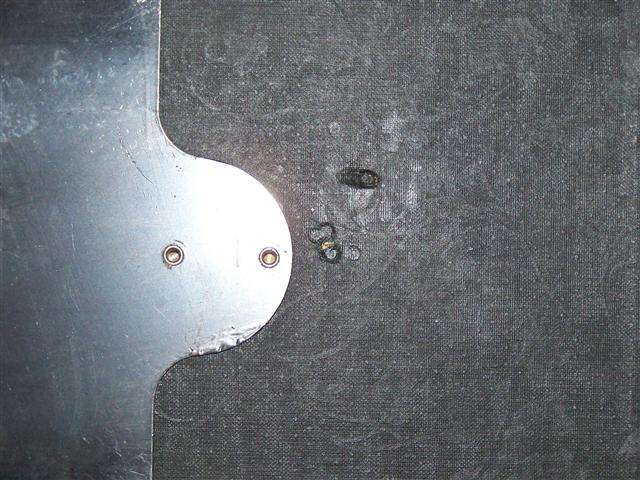 THIS IS MINOR DAMAGE, I DON'T HAVE A CASE AT THIS TIME WITH SOME MAJOR DAMAGE BUT THIS LITTLE AMOUNT OF DAMAGE TO THE LID MAY HAVE BENT OR BROKEN THE SPOOL PIN ON THE MACHINE. I REPAIR THESE OLD MACHINES SO I BUY AND SELL A LOT OF THEM AND I HAVE SEEN SOME REALLY POOR PACKING AND THERE IS NOTING WORSE THAN TO SPEND $100+ ON A MACHINE THAT YOU PURCHASED AND GETTING IT AND BECAUSE OF POOR PACKING THE MACHINE ARRIVES WITH DAMAGE AND THE SELLER SAYS "YOU SHOULD HAVE PUT INSURANCE ON IT". I WANT TO SAY TO EVERYBODY; "INSURANCE DOESN'T COVER DAMAGE IT IS CAUSED BY POOR PACKING, THAT IS THE SELLER OR PACKING COMPANY'S RESPONCEABILTY. INSURANCE IS PAYED IF THE SHIPPING COMPANY IS RESPONCEABLITY FOR THE DAMAGE, OF COURSE THIS MAY VERY DEPENDING ON WHO THE INSURER IS. WHAT I AM POINTING OUT IS, IF YOU PACK IT WELL IT WILL ARRIVE IN THE SAME CONDITION AS PURCHASED. TAKE YOUR MACHINE AND WRAP IT IN BUBBLE WRAP OR WHAT EVER YOU HAVE.
DEPENDING ON THE CASE YOU MAY NEED TO TRIM WRAP SO MACHINE FITS INTO CASE PROPER. THIS IS THE SMALL BUBBLES IF YOU ARE PACKING WITHOUT CASE CAN USE THE BIGGER BUBBLES.
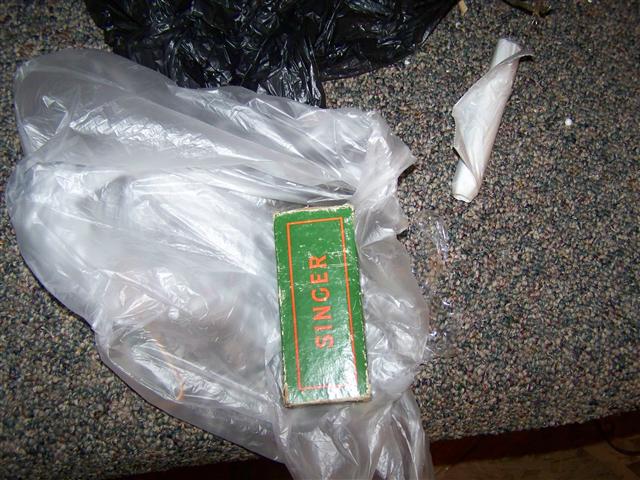
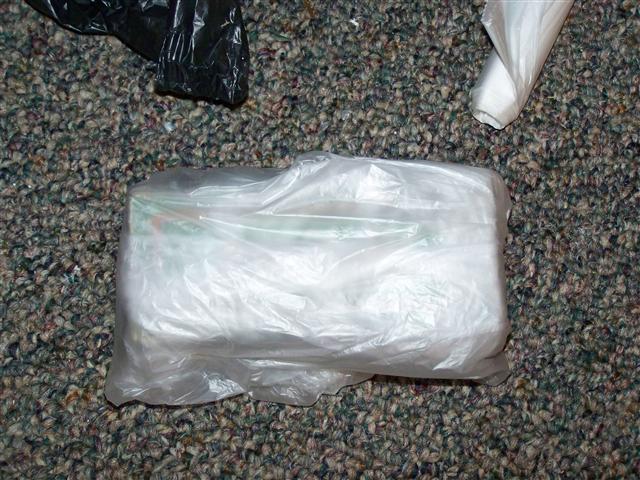
I TAKE PLASTIC OR PLASTIC BAG AND WRAP AROUND ATTACHMENT BOX AND THEN RUN TAPE AROUND TO HELP SUPPORT THE BOX.
IF YOU HAVE OTHER ATTACHMENTS WRAP THEM AND YOU MAY BE ABLE TO FIT IN CASE I ALSO PUT THE BOOK IN A PLATIC BAGGIE AND IF NEEDED PUT BETWEEN CARDBOARD AND CAN BE PUT ALONG THE SIDE OF CASE. IF THE ATTACHMENTS WON'T FIT IN CASE
THE FOOT CONTROL CAN GO AS SEEN OR WRAP WITH BUBBLE WRAP AND LAY ALONG
NOW THAT EVERYTHING IS PACKED SAFE IN THE CASE I TAKE MORE BUBBLE WRAP AND PACK
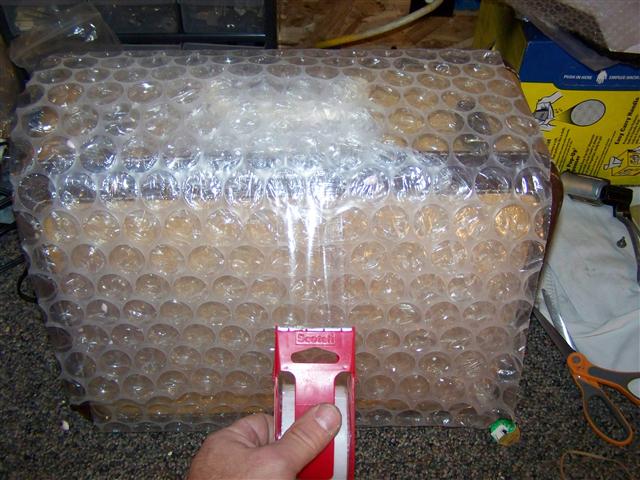
TAKE SOME BUBBLE WRAP AND WRAP OUTSIDE OF CASE AND PUT A LITTLE UNDER HANDLE AFTER YOU GET IT TAPED TAKE THE TAPE AND RUN A LINE ALL THE WAY AROUND IT TO HELP
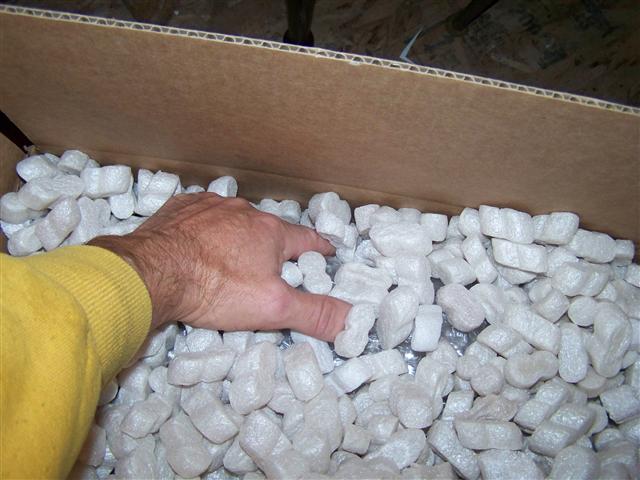
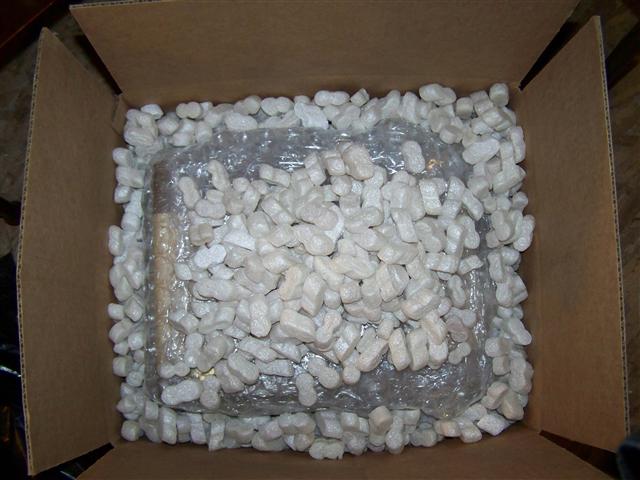
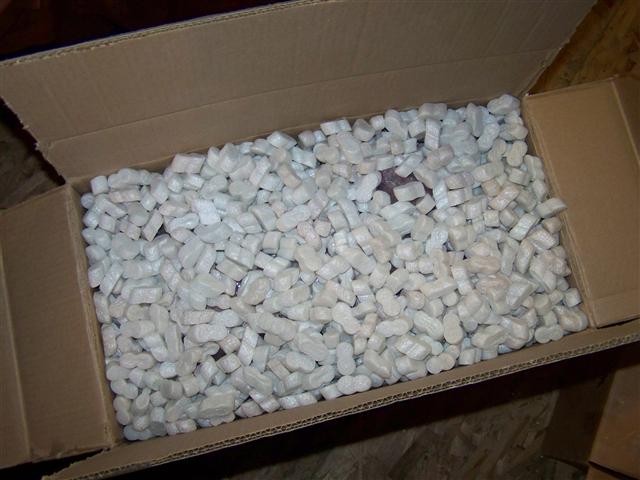
PEANUTS OR PACKING OF YOUR CHOICE ON THE BOTTOM I LAY MACHINE IN ON IT'S SIDE
WHAT I LIKE ABOUT PEANUTS IS IT GIVES THE MACHINE AN AIR RIDE BUT BALLED UP NEWS
I HOPE THIS HELPS YOU AS A PACKER AND IF YOU ARE A BUYER OF MINE THAT IT GIVES YOU THANK YOU AND GOOD LUCK, DUANE
301
THANK YOU FOR TAKING THE TIME AND I HOPE I WAS HELPFUL!! If you have ANY question please call or email me! Call 1-605-359-8939
or email duanesechser@hotmail.com
|
Shopping Cart
|


